

Tuesday, June 28, 2011
Sketchbook Tuesday - At the market
Friday, June 24, 2011
It took a long time

Long Time
colored pencil on Rising Museum Board
5.5 x 7.5 inches
©Ann Thompson Nemcosky
For some reason it took me a long time to complete this drawing. Partly because I have been busy with other projects lately. But also, I would only work on this in short spurts. I had difficulty sitting still for this one, as much as I wanted to see the finished product. So now, I am finally calling it finished, although after I live with it a few days I may tweak it a bit more. And I'm off to choose the next drawing subject, not sure what just yet. I still have other projects going on, too. Summer's the time for fixing up the house and yard. Lots to do there while we can, while the sun shines!
Tuesday, June 21, 2011
Sketchbook Tuesday - Summertime

This sketch is one of the last remaining page spreads in my Spring sketch journal. And now today marks the beginning of summer. Time for a new season and a new sketch journal.
Happy Summer Solstice!
In summer, the song sings itself.
~William Carlos Williams
Thursday, June 16, 2011
One at a time

Tide 2
oil on canvas
6 x 6 inches
©Ann Thompson Nemcosky
This is the second painting in my Tide series and painting #60 of my 100 painting project. I still don't know how many of these little paintings of the surf I will do but I am enjoying the challenge of painting them. I am also enjoying the balance of alternating working in oil with colored pencil drawing. I don't know if I would ever settle on just one media as each has its own challenges and rewards. I suppose that if I had a larger working space I would have several projects going on at once. As it is, I paint one day, draw on another, and it's all good.
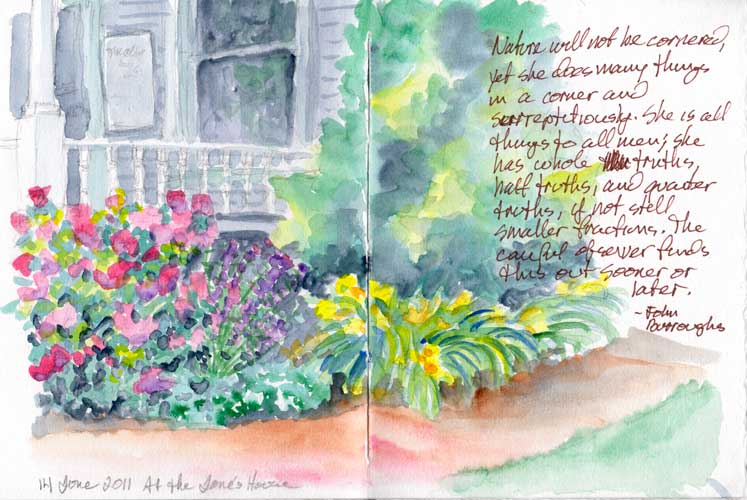
Tuesday, June 14, 2011
Sketchbook Tuesday - Distracted
Thursday, June 9, 2011
Tides

Tide 1
oil on canvas
6 x 6 inches
©Ann Thompson Nemcosky
This is painting #59 of my 100 painting project and the beginning of a series within that project. This is the first painting in that series focusing on tides. I have mentioned here previously my obsession with photographing the water and waves every time we visit the ocean. So I decided to put that obsession to good use and do a series of small 6 x 6 inch paintings, each focusing on the surf. My intention is to then hang these as a grouping. I have no plans for any specific number of paintings, just to keep going until my obsession is satisfied.
I want to thank everyone for their interest in my Pear tutorial posts last week. I have been looking for your pear drawings, so if you have one to post please let me know! Here is one very successful pear from Freebird Drawing.
Tuesday, June 7, 2011
Sketchbook Tuesday - This and that


Friday, June 3, 2011
Let's Draw a Pear! - the final steps
This post concludes the tutorial, Let's Draw a Pear! with the final steps, 6 & 7.


Step Six : Using a kneaded eraser as a drawing tool to create texture

Now you are going to create the textured surface of the pear. Make your kneaded eraser into a pointed shape as shown in the photo above. Dab at areas to make spots where there are dots on the pear. You will probably need to keep reshaping the point on your eraser as it fills up with lifted colored pencil pigment. Your dots don’t have to be perfect. In fact, the irregularities will better mimic the actual spots on the pear. (Notice that I place a scrap piece of tracing paper under my hand to avoid smudging the drawing.)
Also dab at the edges of the white highlighted shapes in order to soften and create irregular edges.
Next, fill in some of the dabbed out dots with Light Yellow Ochre or Brown Ochre to create the dots on the pear. Use Burnt Umber for the dots in the darkest areas.
Step Seven : Putting the final touches on the drawing

Dab at the dots again in a random fashion, less carefully this time. This will make them more irregular in shape and tone. Then go over the entire area of yellow, except for the white highlights, with Cadmium Yellow Lemon. This will help set the textured dots into place. If a dot seems too big or misplaced, continue dabbing to lift pigment and then filling back in with yellow. If the dots you want to adjust are in the red areas, use the same process but fill back in with Light Cadmium Red.
Congratulations! You have now drawn a pear in colored pencil! Thank you for following along with my colored pencil process. I hope that you have found this tutorial helpful and that you will be able to use some of these tips, from photographing your subject to completing a colored pencil drawing, in your own art work.
________________________
If you would like to give the drawing a try yourself, please let me know in the comments with a link to where you are posting your results. I would love to follow along with your progress too!
Also, don't forget that if you would prefer to work from a paper copy of the tutorial you can visit my Tutorial page here on this blog and follow the links to a free PDF file that you may download for yourself.
________________________
Something that I learned while putting together this tutorial is that I don't tend to work in such methodical steps. My drawing process involves much more back and forth, a little here and there, jumping from one area to another. So it was a bit of a challenge for me to try to sort out the process into stages that would make sense to someone else! Which made for a good learning experience for me to really examine what it is that I am doing when I draw. Hopefully it is helpful for you too!
Wednesday, June 1, 2011
Let's Draw a Pear! - Step 5 continued
This post continues with the tutorial, Let's Draw a Pear! Taking up where we left off in step five with applying colored pencil in layers to create form and depth of color, today's post is about adding the shadows to the pear.

 Use Dark Indigo down the right side edge of the pear and on the right side edge of the stem . Add a little Dark Indigo to the base of the cast shadow where it touches the bottom of the pear.
D. Putting in the shadows

Carefully erase the remaining pencil outline except for the cast shadow shape.
Apply a light layer of brown Ochre to the bottom and right, shadowed side of the pear.
Deepen the shadow area with Burnt Umber on the right side of the pear, keeping the edges soft and feathery. Lightly go over the Burnt Umber with Burnt Carmine on the right edge of the pear.
Begin to lightly fill in the cast shadow with Burnt Umber.
Add burnt umber to the right side of the stem for a darker edge.
E. Deepen the shadows

Remember to look carefully at your reference picture! The dark edge is not consistent all the way from the top to the bottom of the pear.
Bring the Dark Indigo out into the cast shadow on the table. Add Burnt Carmine, Light Yellow Ochre and Cadmium Yellow to the shadow’s edges. Dab the cast shadow with a kneaded eraser to blend and soften the edges. Also erase the remaining pencil outline.
Friday's post will complete the tutorial with steps 6 & 7. I hope you are enjoying seeing this process. Remember, if you would prefer to work from a paper copy of the tutorial, you can visit my Tutorial page here on this blog and follow the links to a free PDF file that you may download for yourself.
Subscribe to:
Posts (Atom)